
Figure this would be fitting for my first post on the forums to do a DIY... For those of you that do know me I have been in the Nissan community for years and take pride in doing all of my own work and being a resource to anyone that is looking for advise or guidance in their build...
On to the install of the pumps! I noticed that there were not too many guides out there and what I was able to find was a combination of several threads over multiple forums. So I decided to take a few pics as I worked on the install so everyone would have something to go off of when doing this job themselves.
** Obviously prior to doing this job you want to run the car to empty. I did this by just driving the car until the range read "---" on the computer. The other way to do this is to drain the tank by disconnecting the return fuel line under the hood and placing an extended line into a fuel can and running the car until it is empty. **
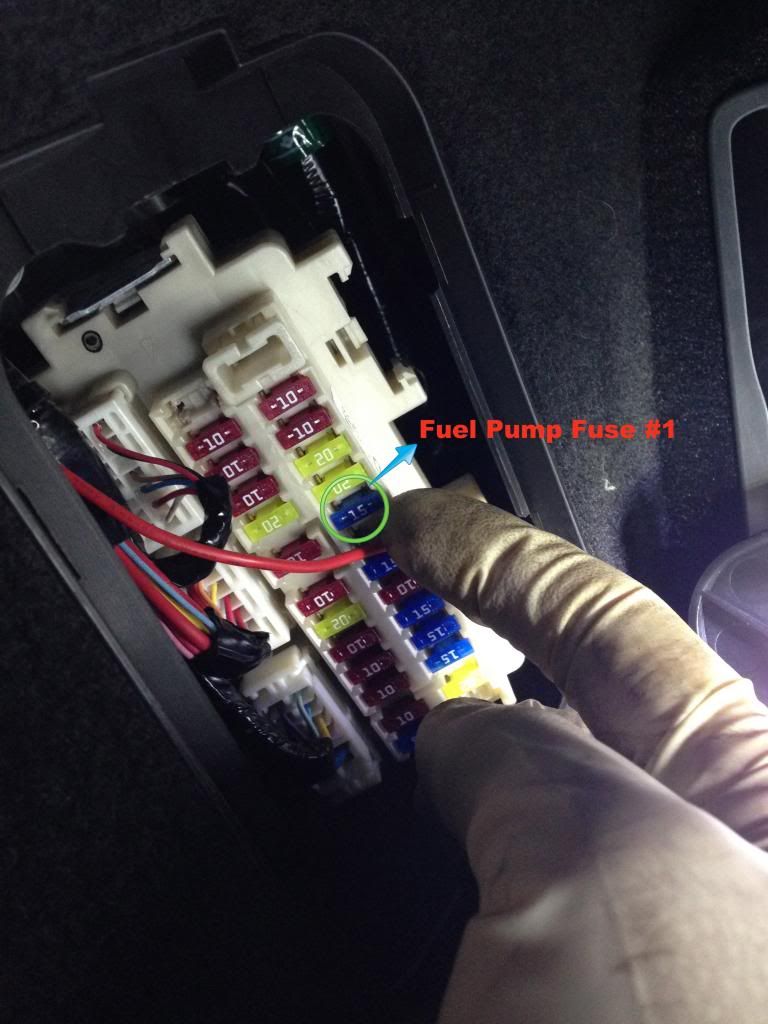
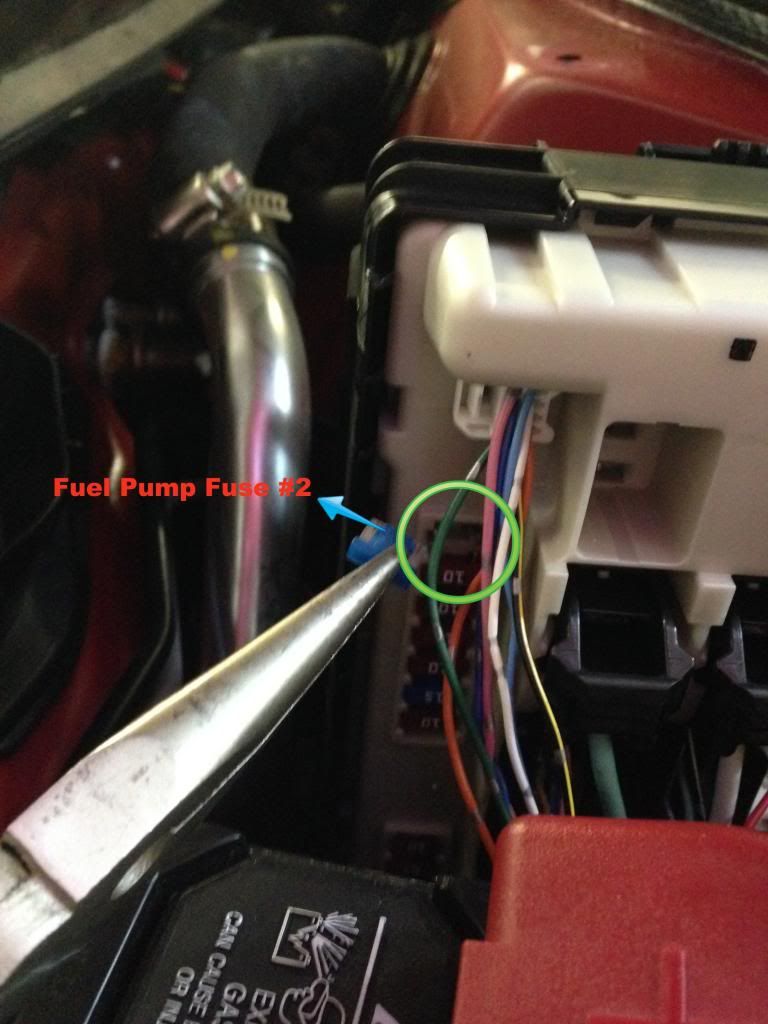
1.) We need to relieve the fuel pressure so that we don't spray fuel everywhere when we disconnect the lines. I found that there are 2 fuel pump fuses in the car, so I removed both of them. One is in the driver footwell and the other is next to the battery.
2.) Start the car with the fuses removed and let it run until it dies, which should only take a few seconds... Now the fuel lines are no longer under pressure and you can safely proceed to the next step. ** Make sure to disconnect the battery before proceeding.
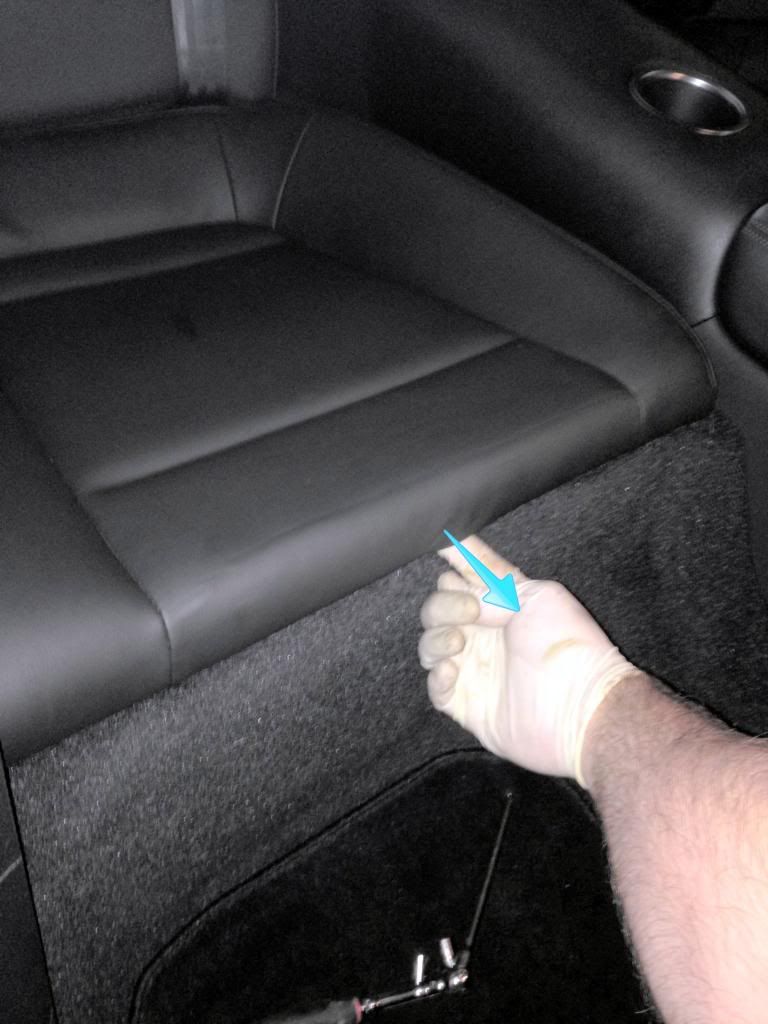
3.) Remove the passenger side rear seat bottom. There is a pull tab in the center of the seat which will release the seat.
4.) Using a philips head screw driver, turn the 4 white plastic tabs that hold the fuel pump cover on the car body.
5.) Next disconnect the 2 electrical connections on top of the fuel pump assembly.
6.) Carefully disconnect the feed and return fuel lines from the top of the fuel pump assembly. Since we already ran the car to relieve the pressure in the lines, they should release fairly easy and only have minimal fuel drip from the lines. It is always a good idea to have a few shop towels handy so that you can collect any fuel that does drip out.
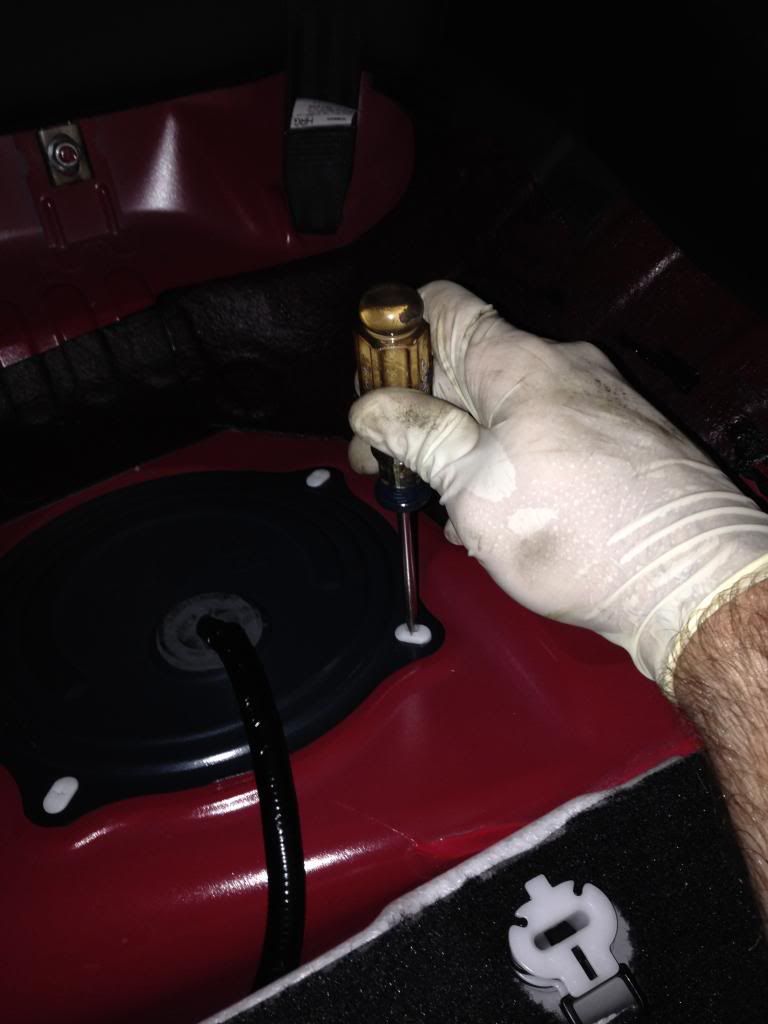
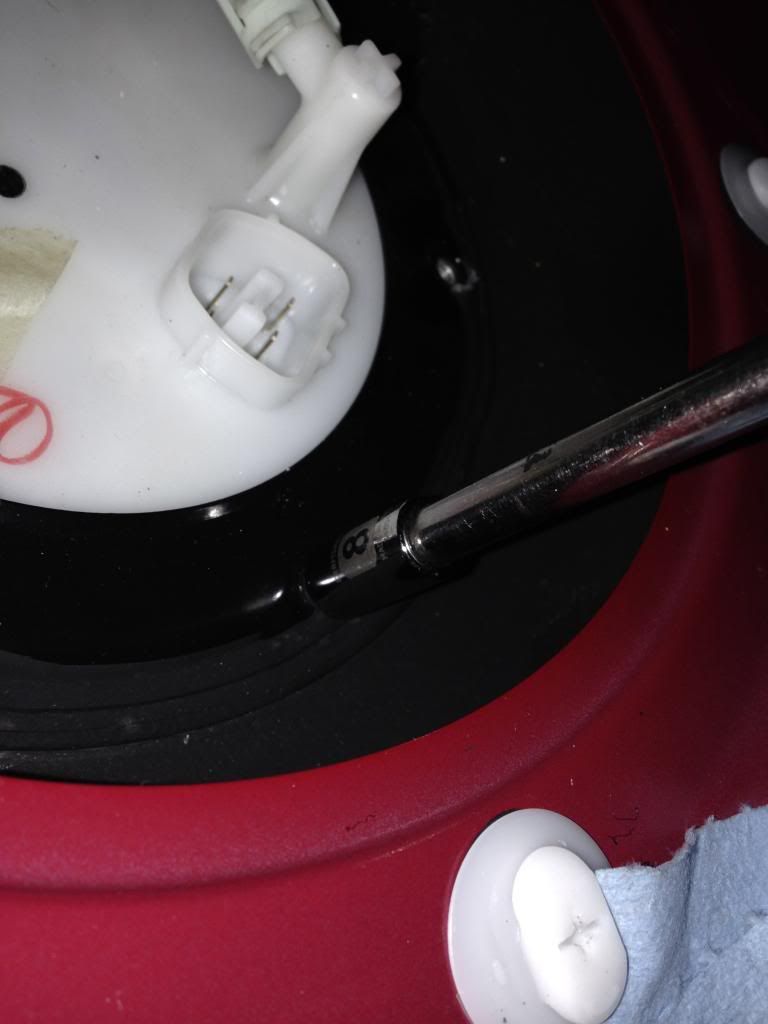
7.) Once all of the connections are removed it is time to remove the 6 8mm bolts that hold the assembly on top of the tank. Normally the assembly is spring loaded from underneath, however due to the design of the GTR fuel system you do not have to worry about this and can take the 6 8mm bolts out without having to worry about it flying up at you
![Image]()
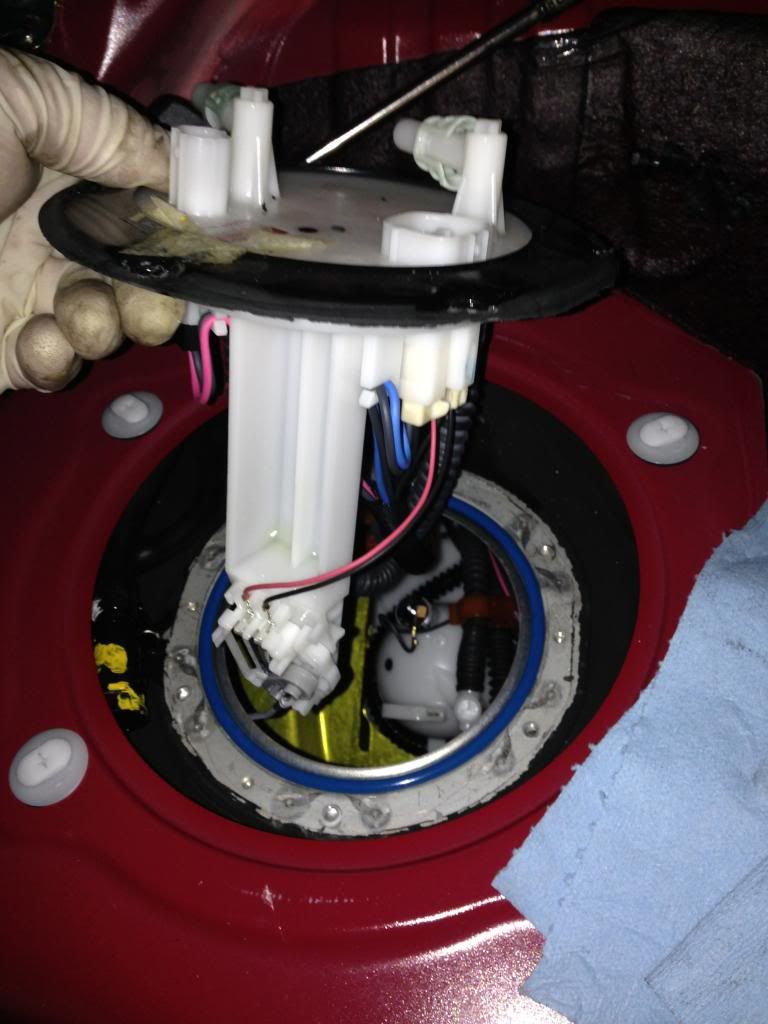
8.) The pump assembly is in 2 separate pieces, carefully remove the top portion of the assembly, making sure not to snag any electrical wires or fuel lines on the edge of the tank causing a puncture...
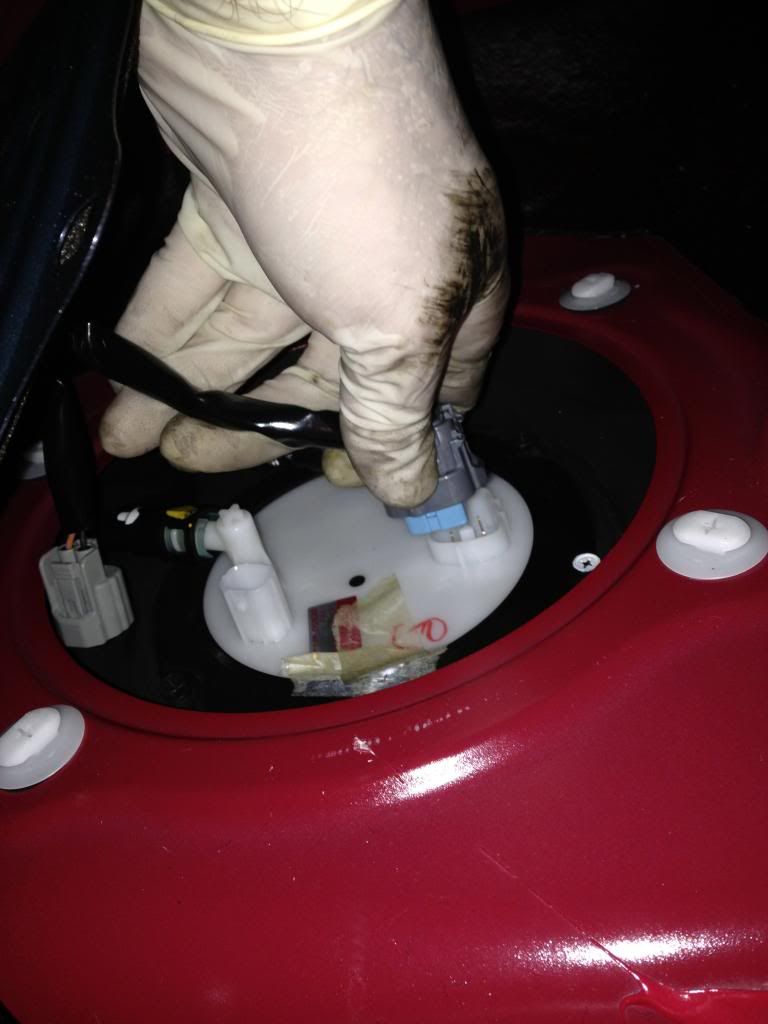
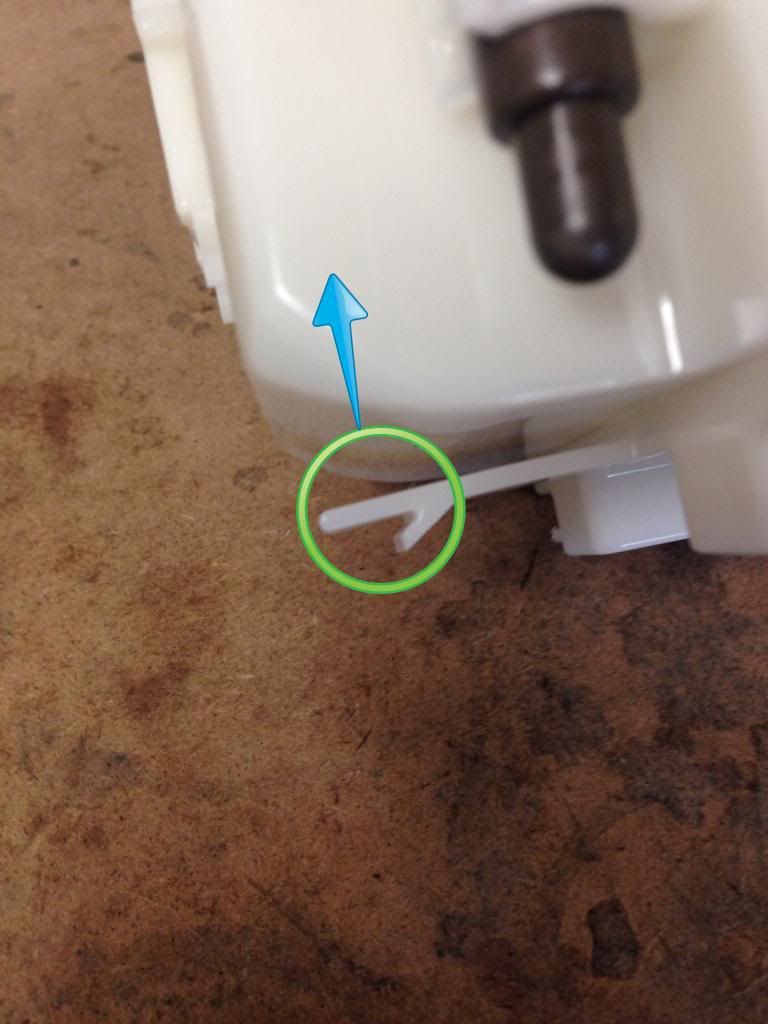
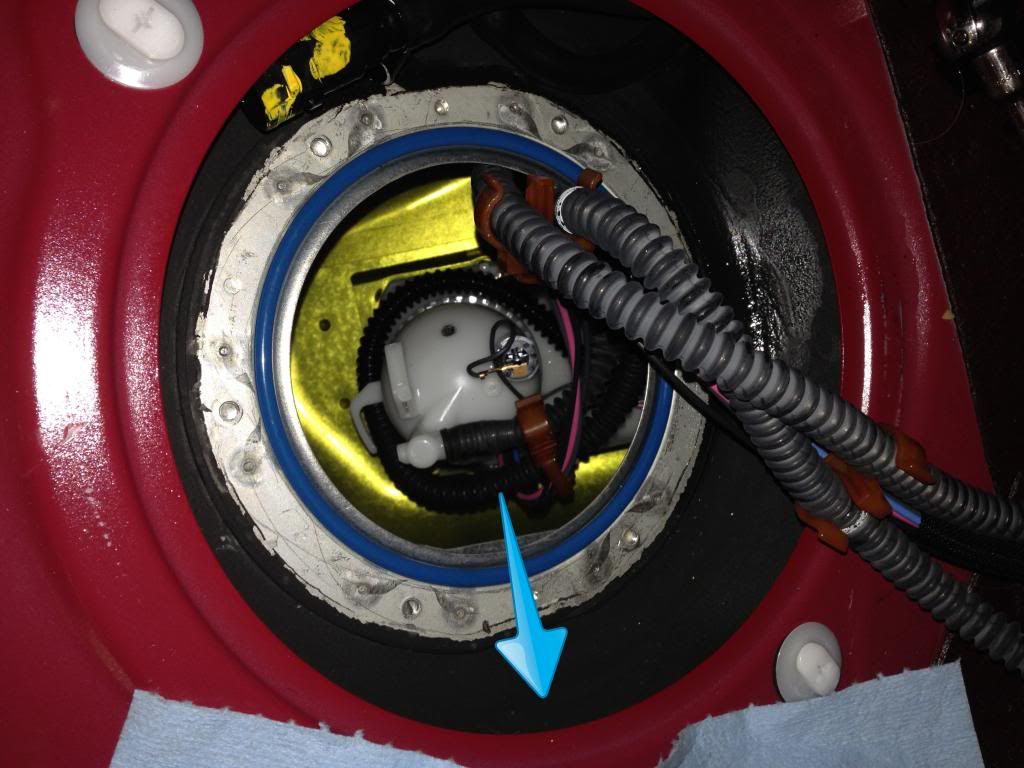
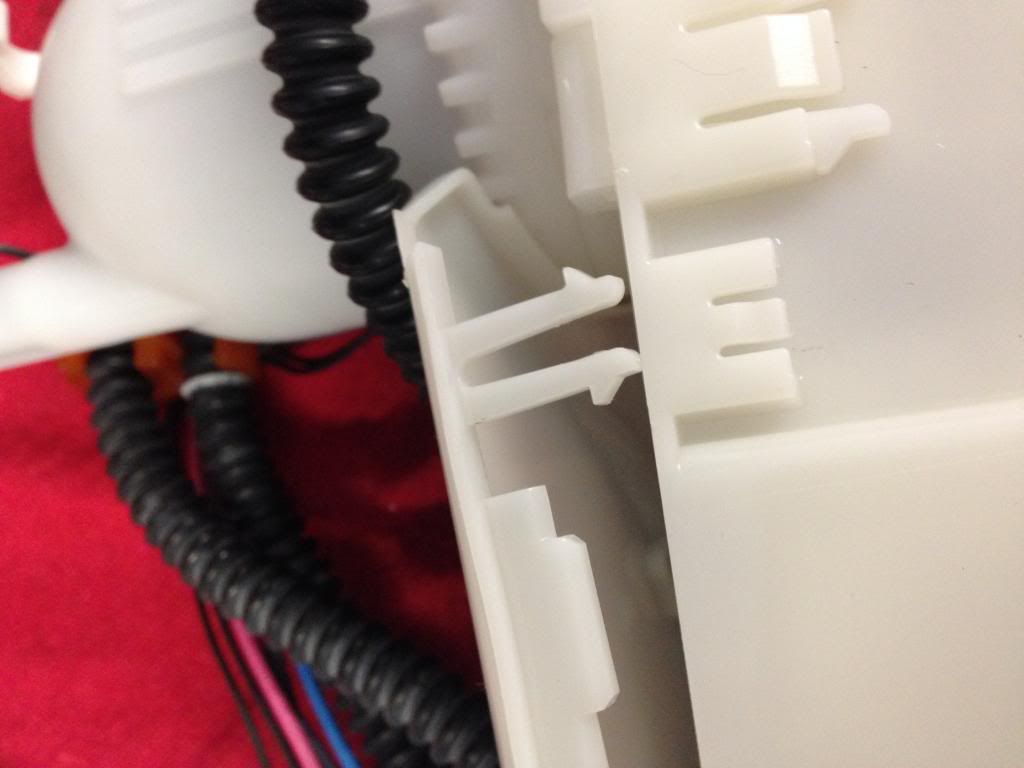
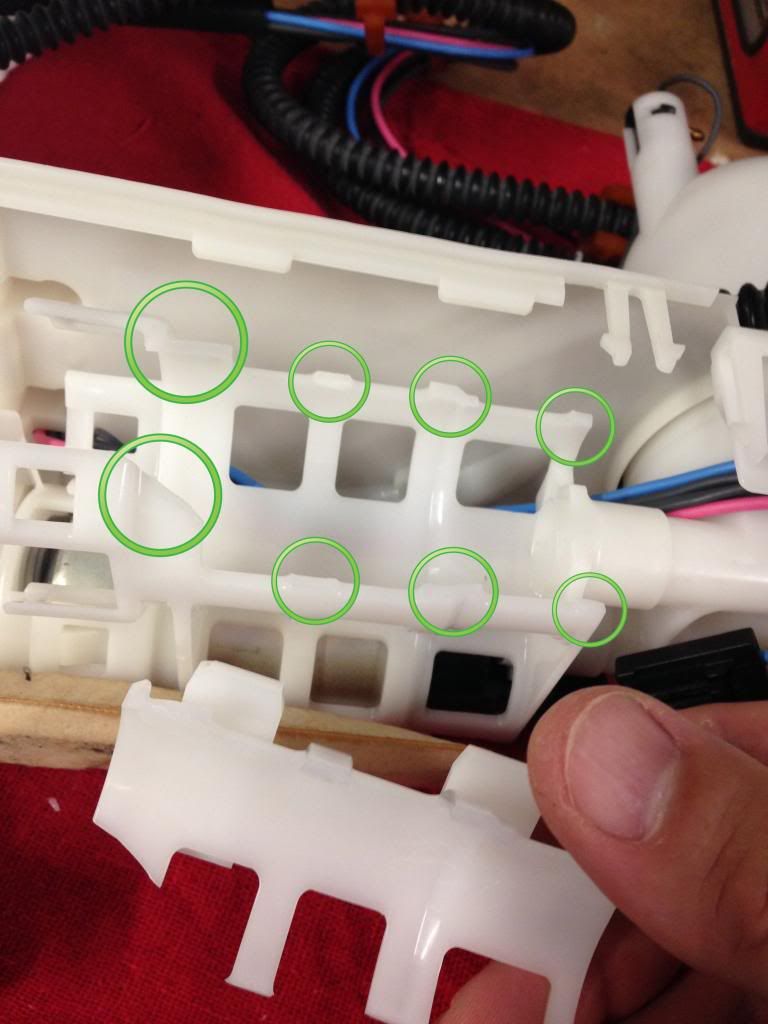
9.) OK, here is the first tricky part of the project. The lower assembly is held in by a track in the tank and a tab on the front. You need to reach in and feel for the tab pictured... Lift that tab up and slide the lower assembly forward to release it from the bottom of the tank.
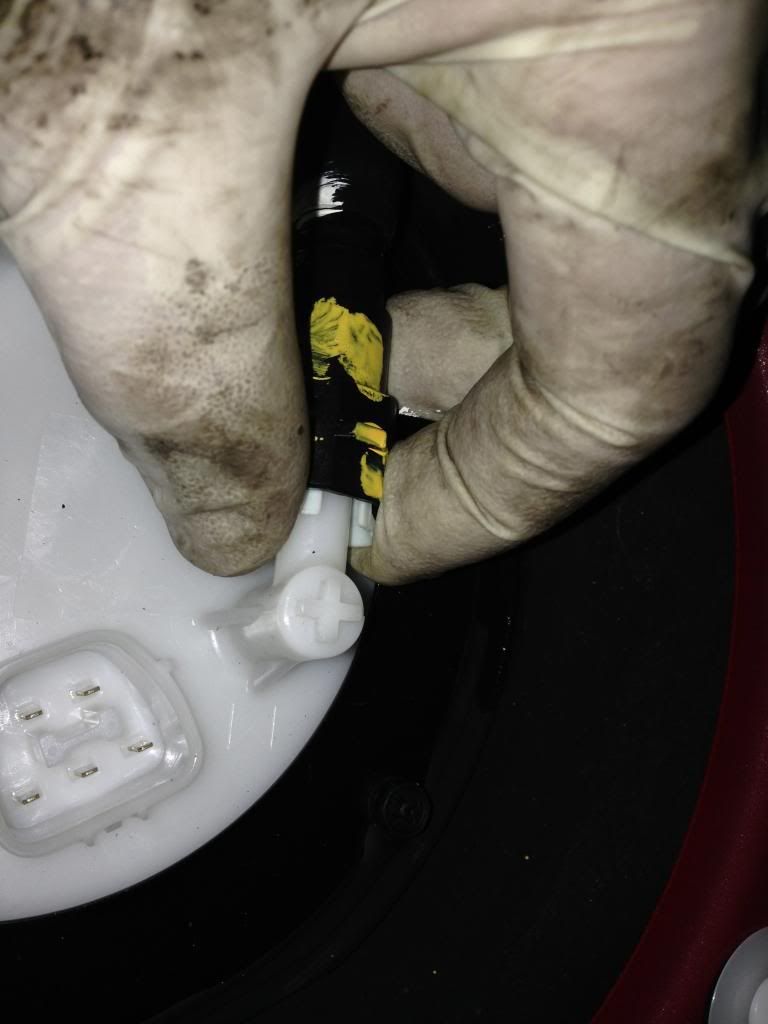
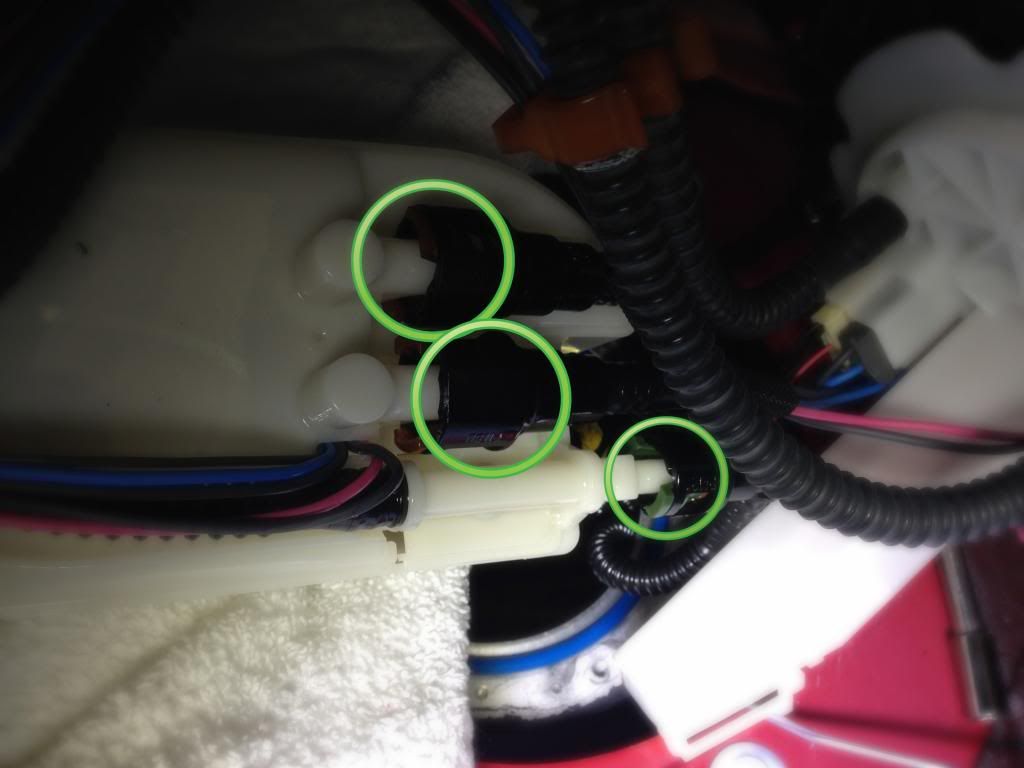
10.) Finally disconnect the 3 fuel lines that are attached to the lower assembly so that you can remove the entire assembly from the car and finish the rest of the work on the work bench...
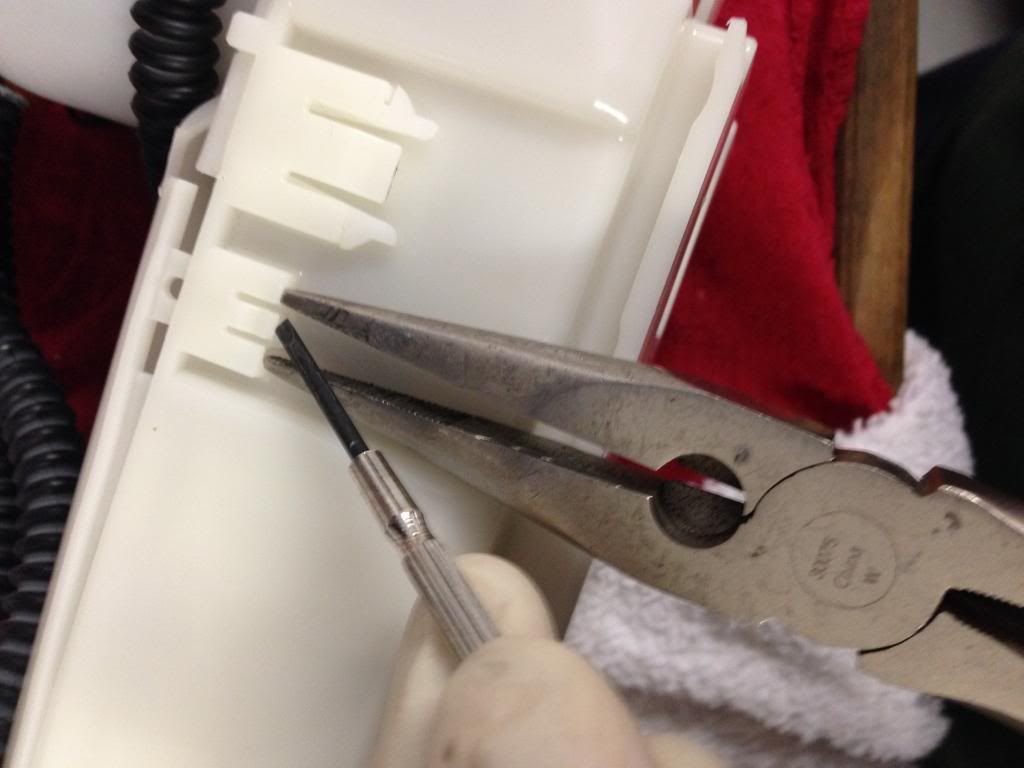
11.) Now that we have the entire assembly out of the car and it is on the work bench it is time to get at those stock pumps! First thing we need to do it separate the lower assembly so we can get to pumps themselves. Using a small flat head screw driver and a pair of needle nose pliers pop up all of the tabs surrounding the assembly.
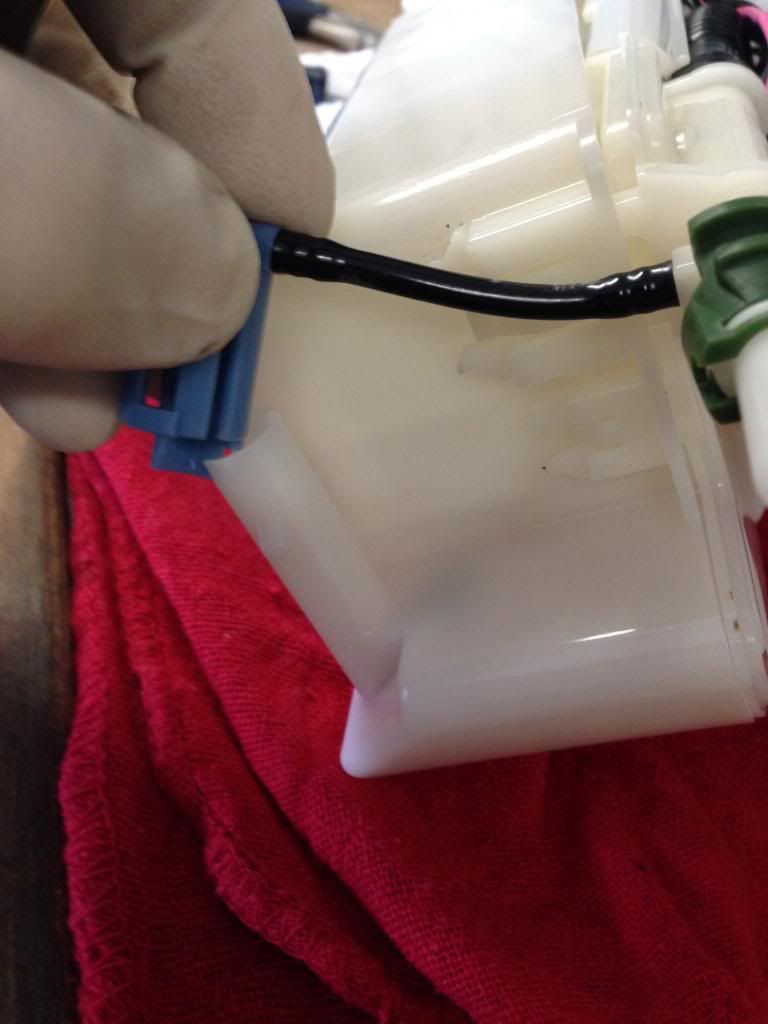
12.) Next disconnect the syphon tube.
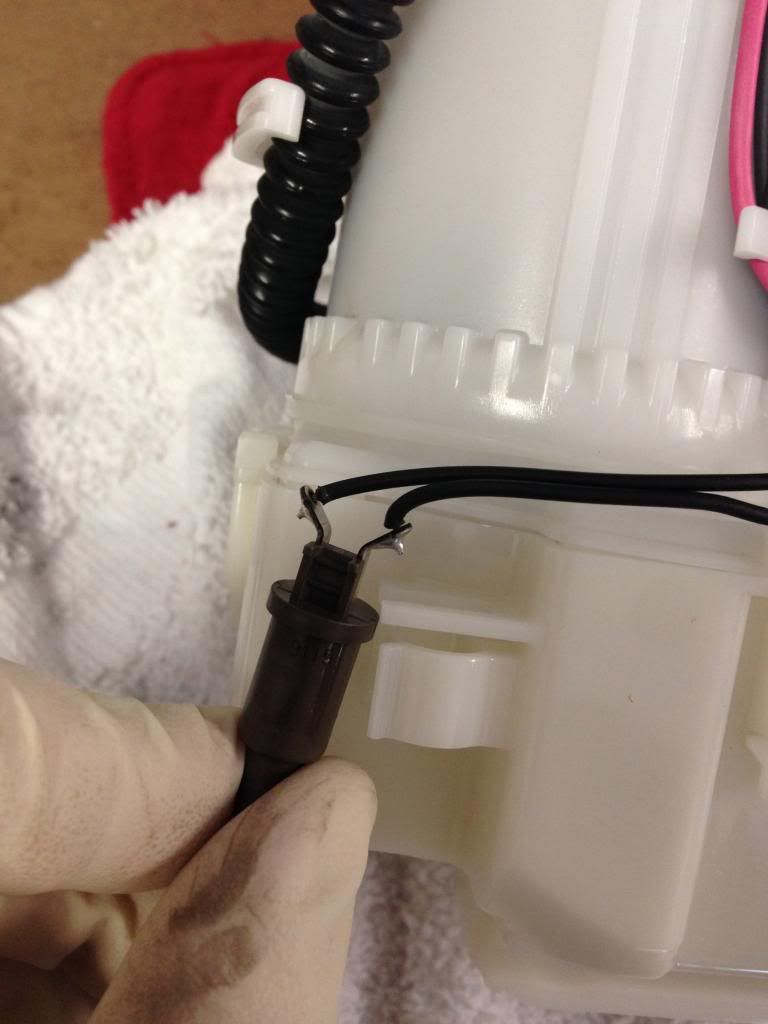
13.) Followed by the (what i believe is the) fuel temp sensor.
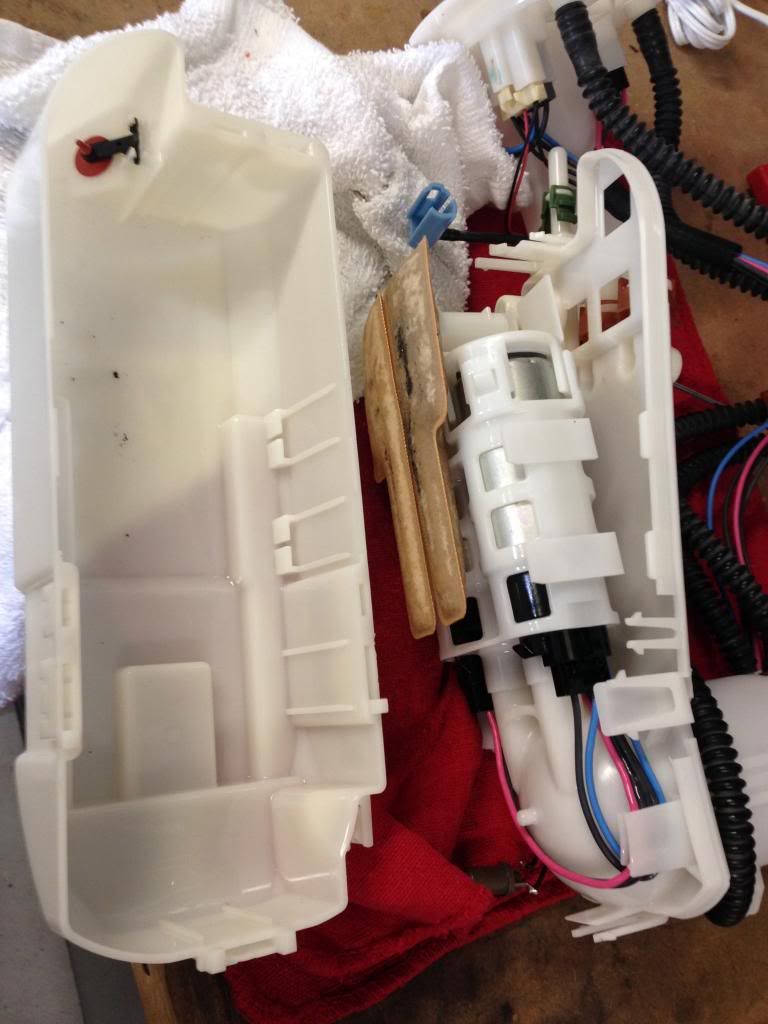
14.) Now we can finally take the lower half of the fuel basket off and expose the pumps.
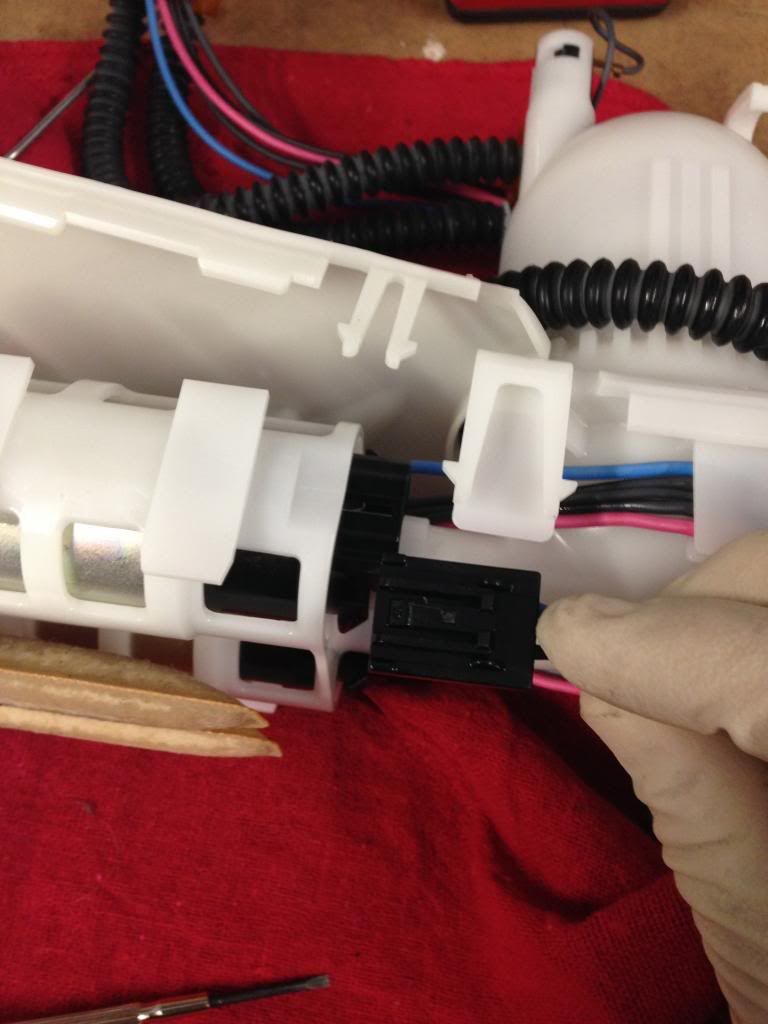
15.) Next disconnect both fuel pump electrical connections.
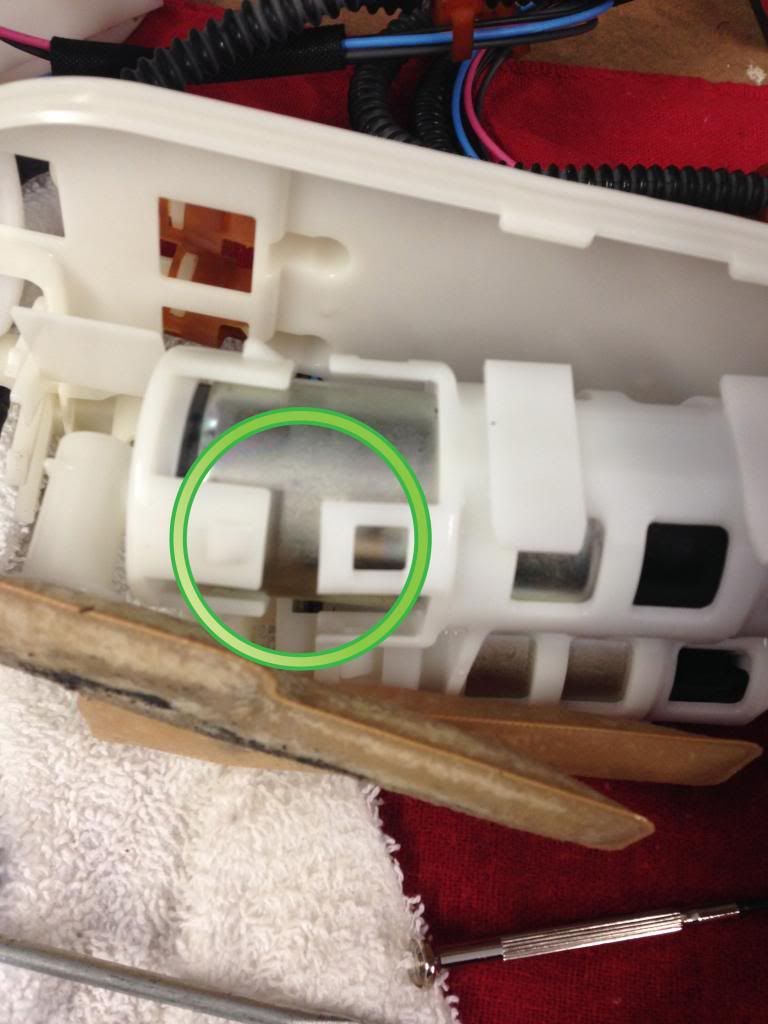
16.) Here is another tricky part of the removal process... You need to lift all 4 tabs securing the pump (and filter) to the basket. I used 2 flat head screw drivers; one to lift the tab and the other to apply pressure to the base with the filter. Work your way around the 4 tabs and it should pop right off.
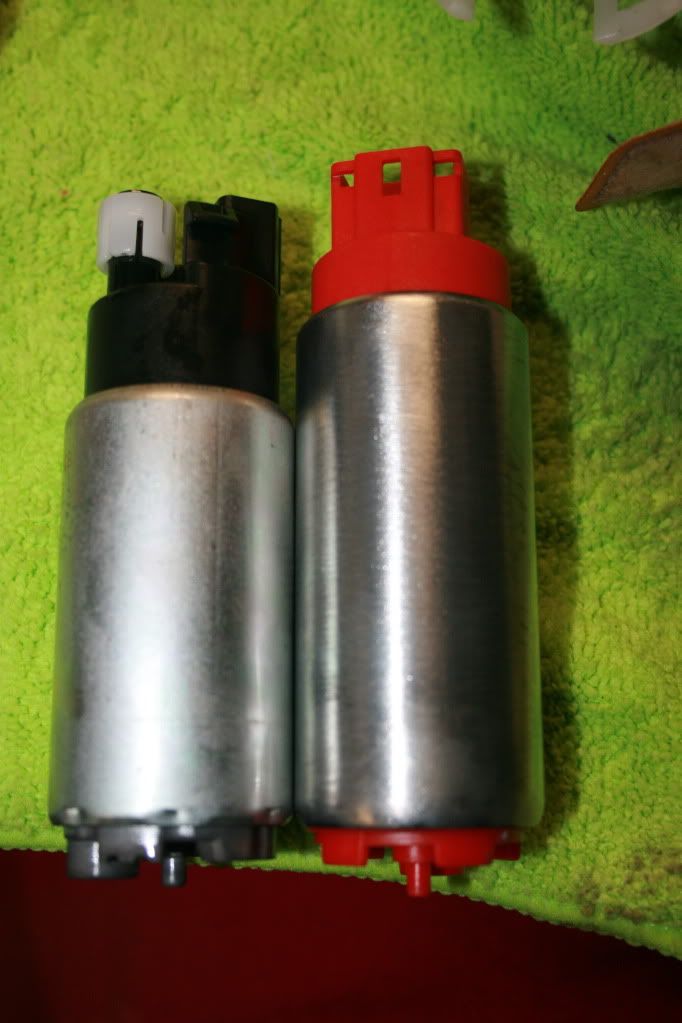
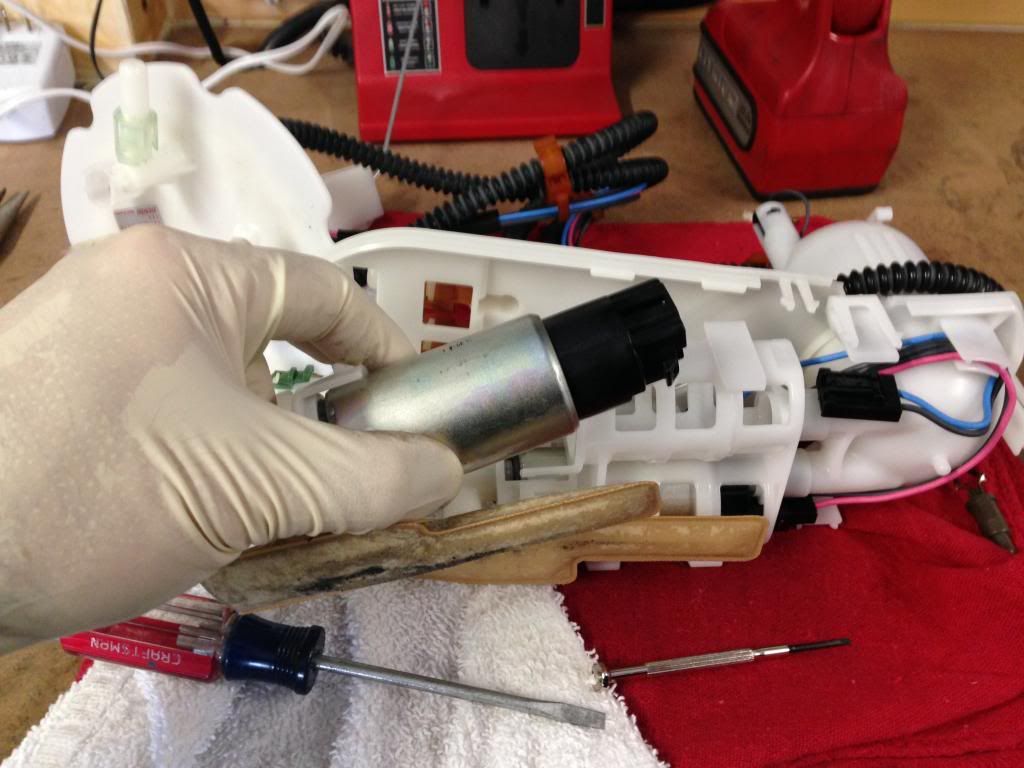
17.) Remove the stock pumps from the retaining basket.
18.) Now we need to modify the Aeromotive pumps so that they will fit properly into the factory fuel baskets. Use a high speed cut off wheel (or similar tool) and remove just enough material to allow the pump to slide in flush when it is mounted.

19.) Swap over the o-ring, spacer (white plastic piece on fuel outlet side of pump), and filter assembly to the new Aeromotive pumps.
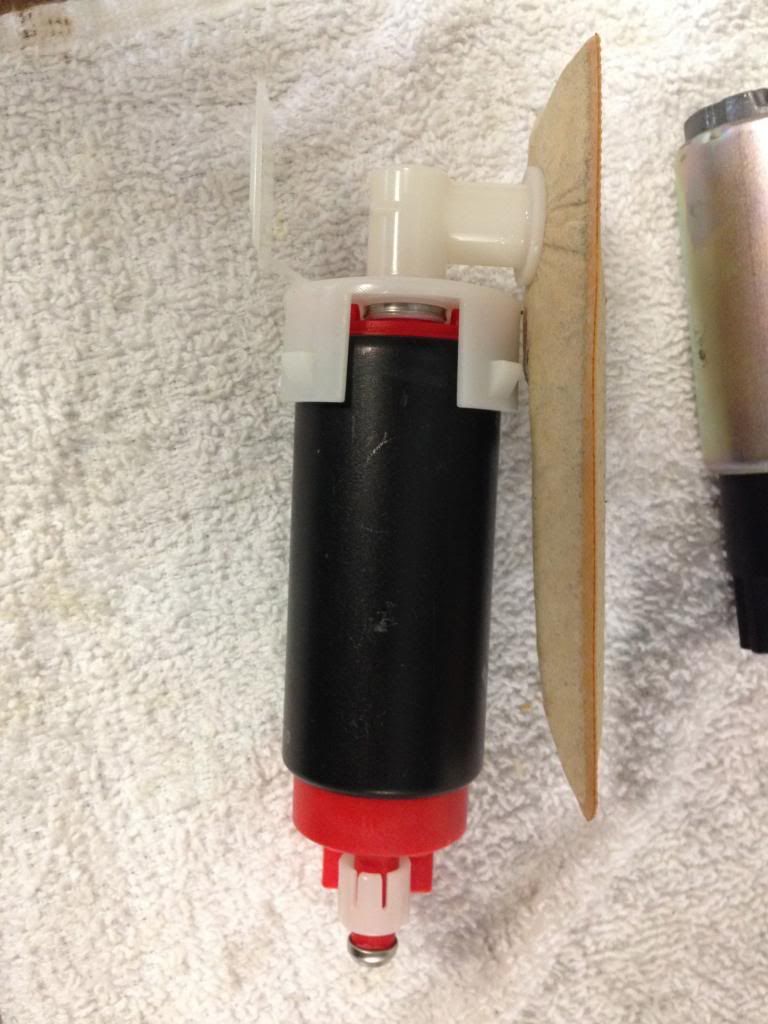
20.) Since the Aeromotive pumps are not exactly the same as the OEM pumps we also need to modify the baskets themselves. The fuel outlet tube is slightly offset and the over all length is slightly longer than the OEM pumps as well. I used an razor blade to cut the basket assembly as pictured below. Make sure to retain the 4 mounting points at the bottom of the basket so we can secure the pumps properly in the next step.
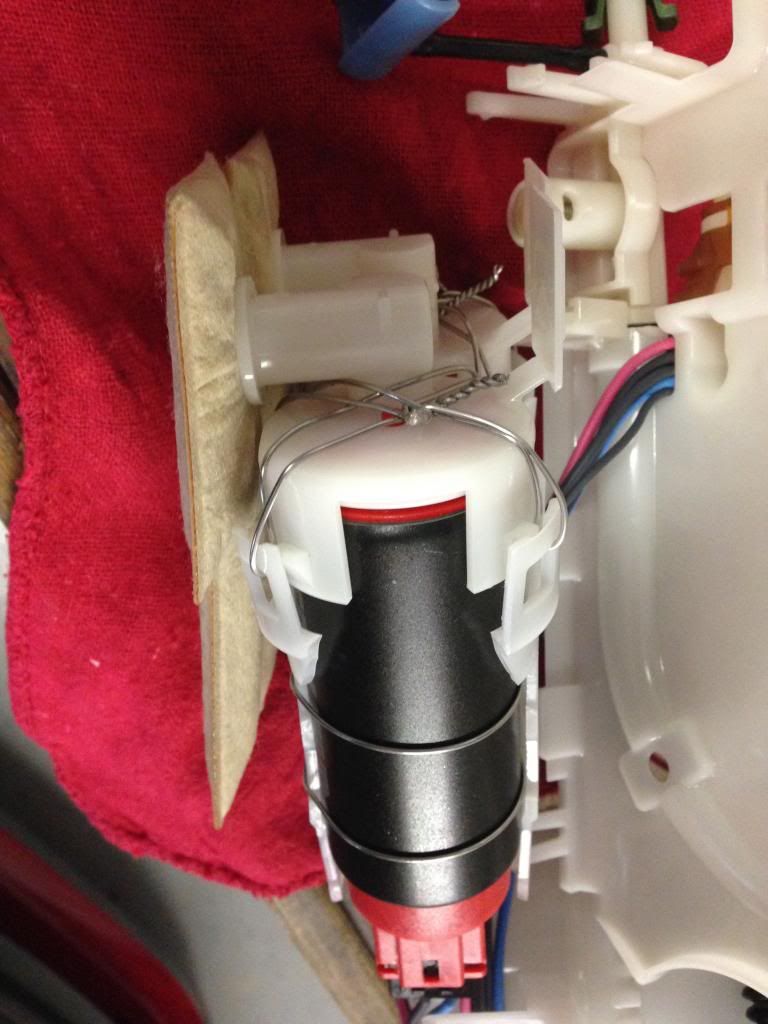
21.) We need a way to secure the new fuel pumps into the baskets so that when the system is under pressure, it stays in place. Probably the best and easiest way to do this is to use stainless steel safety wire as pictured below. Take special care to ensure the wire is tight against the fuel filter base when spinning the wire down. I also used 2 wires on the bodies of the pumps for a little extra insurance as well as to keep the pump aligned in the feeder tube...
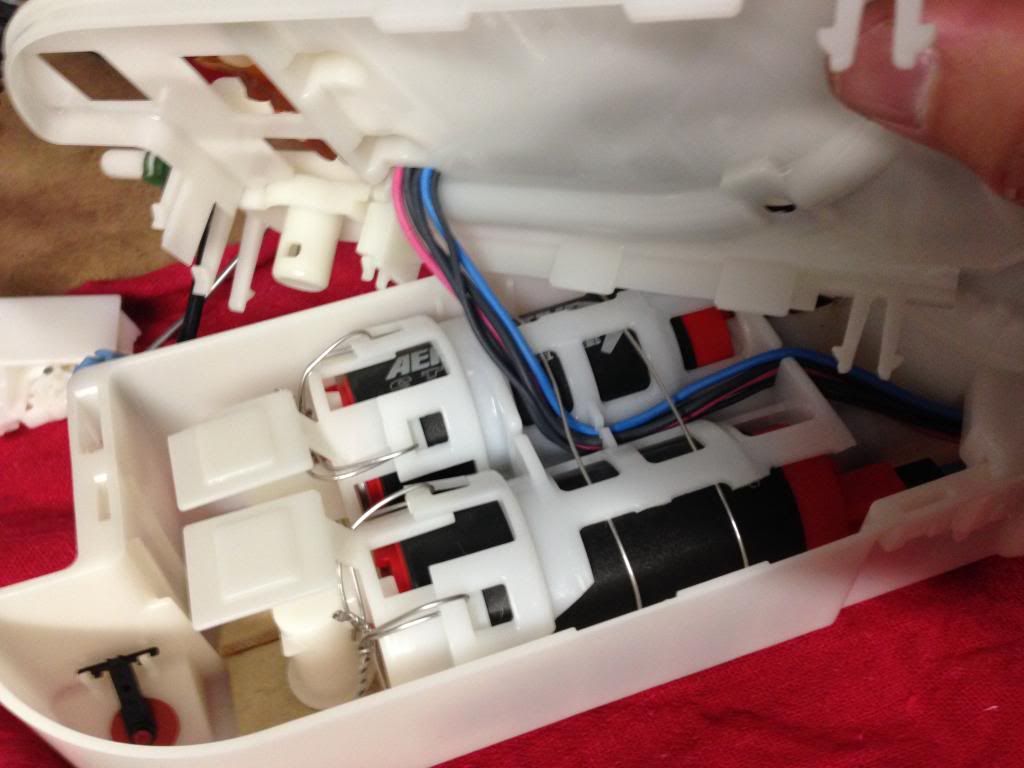
22.) Place the pumps back in the lower fuel fuel basket making sure that the electrical wiring is secure and that the safety wire is bent in such a way that you can close the housing properly.
Now just reverse the process for removal to install the pumps back into the tank. Make sure that you slide the lower assembly back on to the tracks and that the retaining clip catches before you proceed with the upper assembly. Also make sure that the fuel level float does not get tangled on the fuel lines inside the tank. I have seen this happen many times in the past and it will cause your tank level readings to be off consistently. It is also very easy to over tighten the 6 8mm bolts that hold the upper assembly to the top of the tank, be very careful here, stripping one of these bolts will result in a bad day.
![Image]()
Hope this helps everyone in the future and I hope to provide many more write-ups and contributions to the community in the future!
On to the install of the pumps! I noticed that there were not too many guides out there and what I was able to find was a combination of several threads over multiple forums. So I decided to take a few pics as I worked on the install so everyone would have something to go off of when doing this job themselves.
** Obviously prior to doing this job you want to run the car to empty. I did this by just driving the car until the range read "---" on the computer. The other way to do this is to drain the tank by disconnecting the return fuel line under the hood and placing an extended line into a fuel can and running the car until it is empty. **
1.) We need to relieve the fuel pressure so that we don't spray fuel everywhere when we disconnect the lines. I found that there are 2 fuel pump fuses in the car, so I removed both of them. One is in the driver footwell and the other is next to the battery.


2.) Start the car with the fuses removed and let it run until it dies, which should only take a few seconds... Now the fuel lines are no longer under pressure and you can safely proceed to the next step. ** Make sure to disconnect the battery before proceeding.
3.) Remove the passenger side rear seat bottom. There is a pull tab in the center of the seat which will release the seat.

4.) Using a philips head screw driver, turn the 4 white plastic tabs that hold the fuel pump cover on the car body.

5.) Next disconnect the 2 electrical connections on top of the fuel pump assembly.

6.) Carefully disconnect the feed and return fuel lines from the top of the fuel pump assembly. Since we already ran the car to relieve the pressure in the lines, they should release fairly easy and only have minimal fuel drip from the lines. It is always a good idea to have a few shop towels handy so that you can collect any fuel that does drip out.

7.) Once all of the connections are removed it is time to remove the 6 8mm bolts that hold the assembly on top of the tank. Normally the assembly is spring loaded from underneath, however due to the design of the GTR fuel system you do not have to worry about this and can take the 6 8mm bolts out without having to worry about it flying up at you


8.) The pump assembly is in 2 separate pieces, carefully remove the top portion of the assembly, making sure not to snag any electrical wires or fuel lines on the edge of the tank causing a puncture...

9.) OK, here is the first tricky part of the project. The lower assembly is held in by a track in the tank and a tab on the front. You need to reach in and feel for the tab pictured... Lift that tab up and slide the lower assembly forward to release it from the bottom of the tank.


10.) Finally disconnect the 3 fuel lines that are attached to the lower assembly so that you can remove the entire assembly from the car and finish the rest of the work on the work bench...

11.) Now that we have the entire assembly out of the car and it is on the work bench it is time to get at those stock pumps! First thing we need to do it separate the lower assembly so we can get to pumps themselves. Using a small flat head screw driver and a pair of needle nose pliers pop up all of the tabs surrounding the assembly.


12.) Next disconnect the syphon tube.

13.) Followed by the (what i believe is the) fuel temp sensor.

14.) Now we can finally take the lower half of the fuel basket off and expose the pumps.

15.) Next disconnect both fuel pump electrical connections.

16.) Here is another tricky part of the removal process... You need to lift all 4 tabs securing the pump (and filter) to the basket. I used 2 flat head screw drivers; one to lift the tab and the other to apply pressure to the base with the filter. Work your way around the 4 tabs and it should pop right off.

17.) Remove the stock pumps from the retaining basket.

18.) Now we need to modify the Aeromotive pumps so that they will fit properly into the factory fuel baskets. Use a high speed cut off wheel (or similar tool) and remove just enough material to allow the pump to slide in flush when it is mounted.

19.) Swap over the o-ring, spacer (white plastic piece on fuel outlet side of pump), and filter assembly to the new Aeromotive pumps.

20.) Since the Aeromotive pumps are not exactly the same as the OEM pumps we also need to modify the baskets themselves. The fuel outlet tube is slightly offset and the over all length is slightly longer than the OEM pumps as well. I used an razor blade to cut the basket assembly as pictured below. Make sure to retain the 4 mounting points at the bottom of the basket so we can secure the pumps properly in the next step.

21.) We need a way to secure the new fuel pumps into the baskets so that when the system is under pressure, it stays in place. Probably the best and easiest way to do this is to use stainless steel safety wire as pictured below. Take special care to ensure the wire is tight against the fuel filter base when spinning the wire down. I also used 2 wires on the bodies of the pumps for a little extra insurance as well as to keep the pump aligned in the feeder tube...

22.) Place the pumps back in the lower fuel fuel basket making sure that the electrical wiring is secure and that the safety wire is bent in such a way that you can close the housing properly.

Now just reverse the process for removal to install the pumps back into the tank. Make sure that you slide the lower assembly back on to the tracks and that the retaining clip catches before you proceed with the upper assembly. Also make sure that the fuel level float does not get tangled on the fuel lines inside the tank. I have seen this happen many times in the past and it will cause your tank level readings to be off consistently. It is also very easy to over tighten the 6 8mm bolts that hold the upper assembly to the top of the tank, be very careful here, stripping one of these bolts will result in a bad day.

Hope this helps everyone in the future and I hope to provide many more write-ups and contributions to the community in the future!